We offer a wide range of services for that fresh look, or just maintenance or updates to keep your home functioning and safe. Regardless of the size of the job, we have a craftsman that can tackle it.
Home Maintenance / September 26, 2016
Feeling frustrated because you’ve tried everything in the book to clean the grout in your shower and it’s just not working? Or how about that feeling of not wanting to see chipped grout in your bathroom every time you need to take a shower? Don’t worry; the crew at Handyman Connection of Boise feels your pain. We’d like to help guide you through a few tips and suggestions if it’s time to re-grout your shower.
As a preface, hardened grout before it’s where you want it or before it’s off the tile is not an easy task to tackle, but by following these tips, it should be a fairly simple process.
Firstly, you’ll need to remove the old, chipped, or dirty grout. This will take a little bit of elbow grease, but we have faith in you. There are grout removal tools that you can find in our local hardware stores or online for very cheap. You can also use a power tool if you’re not looking for a workout. Simply chip away the old grout. More than likely, it will start coming off in chunks, making it a little easier to get it all out. Remove it from the area you’re working in once it’s all gone.
Next, let the grout set and then remix it so that it is properly combined and will be easy to apply. Follow the instructions on the container that you purchased the grout in for mixing purposes. Be sure to follow them closely as the consistency of the grout is important before applying. It should look like mayonnaise when you are ready to grout. You can also incorporate a grout color dye if that interests you.
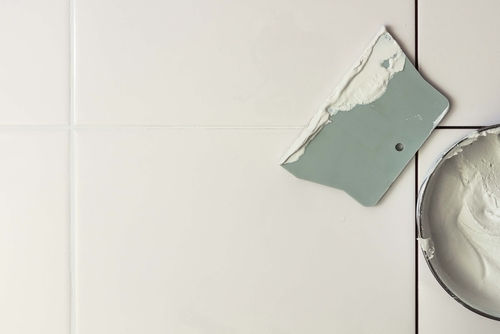
After the grout is ready to go, begin applying it to the wall with a grout float in upward strokes. Don’t worry about getting in the joints yet, but do work quickly as the grout can start to harden quickly making it extremely difficult to get off of your tiles.
Next, position the float in a 45-degree angle to fill the joints and press hard. Make sure each joint is completely filled with grout. Shape the joints with the corner of the float to help with this. After the joints are filled in as best as you can, remove the grout from the wall and tiles with a damp sponge. Don’t push too hard or scrape as this can damage the tiles, and be sure to wear gloves.
After the grout is dry, which will be fairly quickly after you’re finished, remove any excess from where you’d like to finish the shower with caulk. If you’re not sure how to go about caulking, give us a call and we’d be happy to help or happy to tackle the project for you. Don’t forget that our expert craftsmen at Handyman Connection of Boise are here to help with any of your home maintenance projects.
211 E Pine Ave Suite 105
Meridian, ID 83642
License #RCE-43081

© Handyman Connection 2024 | Privacy Policy
 (208) 901-3999